How to eat lighter without eating blander — the methods that changed how I cook every day.
By Youssef El Amrani · June 2026 · 9 min read
Three years ago, my doctor told me my cholesterol was climbing and I needed to cut back on oil and butter. I nodded politely, went home, and stared at my kitchen with dread. Every recipe I knew started with a generous pour of olive oil or a pat of butter melting in the pan. Without that fat, I assumed my food would taste like steamed cardboard. I was wrong — but only after I learned that healthy cooking is not about removing flavor. It is about finding different ways to build it.
This article is not a diet plan. It is not a list of restrictions. It is a collection of cooking techniques that reduce calories, preserve nutrients, and — this is the part that matters — keep your food tasting like something you actually want to eat. These are the methods I use in my own kitchen, judged by one standard: would I serve this to guests without apologizing for it being “healthy”?
Steaming: The Most Underrated Technique in Your Kitchen
Steaming has a reputation problem. People associate it with hospital food and bland diet meals. But steaming is simply cooking with water vapor instead of submerging food in water or coating it in oil. The food cooks in its own juices, retaining more vitamins and minerals than boiling, and the texture stays firmer and more vibrant.
The key to flavorful steaming is what happens after the food comes out of the steamer. A plain steamed chicken breast is boring. A steamed chicken breast finished with a squeeze of lemon, a sprinkle of fresh herbs, and a drizzle of good olive oil is something entirely different. The fat is still there — but it is used as a seasoning, not as the cooking medium.
🌿 How to Steam Vegetables Without Losing Color or Crunch
Bring one inch of water to a boil in a pot with a tight-fitting lid. Place vegetables in a steamer basket above the water — not touching it. Cover and steam until just tender when pierced with a fork. The exact time depends on the vegetable:
| Vegetable | Steam Time | Doneness Test |
|---|---|---|
| Broccoli | 4–5 minutes | Bright green, fork-tender |
| Green beans | 5–6 minutes | Tender with slight snap |
| Carrots (sliced) | 6–8 minutes | Easily pierced, still firm |
| Asparagus | 3–5 minutes | Bright green, tips tender |
| Fish fillet | 8–10 minutes | Opaque, flakes easily |
| Chicken breast | 15–18 minutes | Internal temp 165°F (74°C) |
💡 Pro Tip: Season vegetables after steaming, not before. Salt draws out moisture during cooking, leaving steamed vegetables wet and bland. A light toss with salt, pepper, lemon juice, and a teaspoon of olive oil after steaming transforms plain vegetables into something craveable.
Roasting: The Dry Heat That Concentrates Flavor
Roasting is the opposite of steaming in almost every way — and that is why the two techniques complement each other so well. Where steaming preserves moisture and delicate textures, roasting drives moisture out, concentrating flavors and creating the Maillard reaction that produces deep, complex tastes and appealing textures.
The health advantage of roasting is that it requires very little added fat. A light coating of oil — one to two tablespoons for a full sheet pan of vegetables — is enough to promote browning without adding significant calories. The high heat of the oven does the flavor work that butter and heavy sauces used to do.
🔥 High Heat Roasting (425–450°F)
Best for: Root vegetables, Brussels sprouts, cauliflower, broccoli. Creates charred edges and caramelized surfaces. Use a light coating of oil and do not crowd the pan.
🌡️ Moderate Roasting (350–375°F)
Best for: Chicken, fish, delicate vegetables. Cooks evenly without burning. Allows seasonings to meld. Cover with foil for the first half to retain moisture.
⚠️ Common Mistake: Crowding the roasting pan. When vegetables are piled on top of each other, they steam instead of roast. Spread them in a single layer with space between pieces. Use two pans if necessary. The extra pan is worth the caramelization.
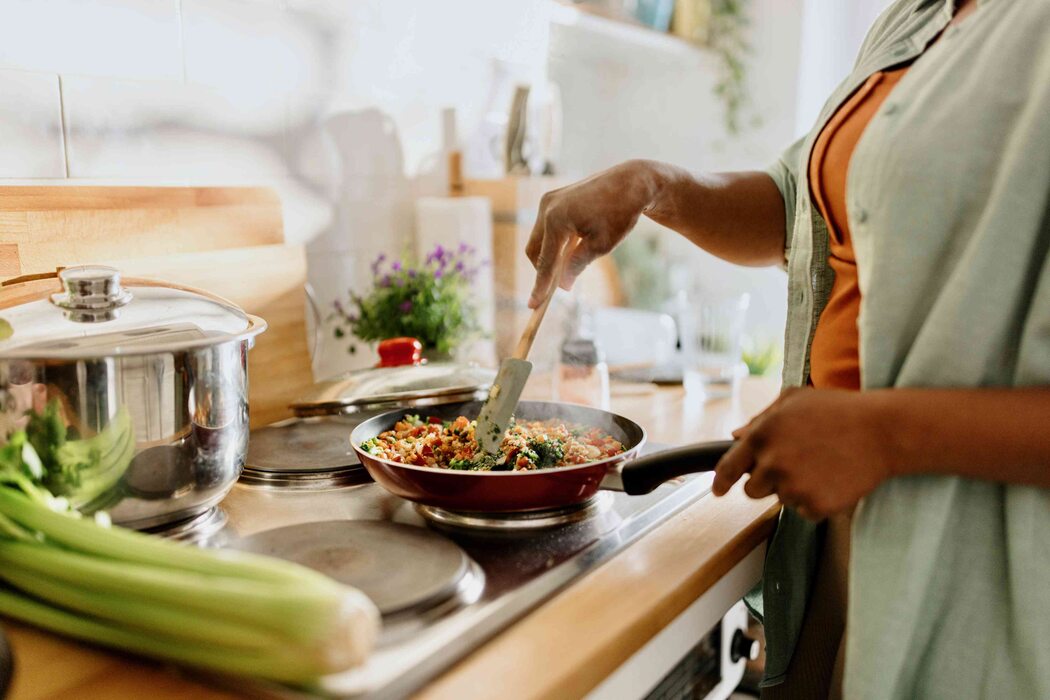
Sautéing with Less Oil: The Water Sauté Method
Sautéing is the foundation of most savory cooking. Onions, garlic, and aromatics hit a hot pan and release their flavors into the fat. But that fat adds up quickly. A tablespoon of olive oil contains 120 calories, and most recipes call for two to three tablespoons just to start.
The water sauté method solves this problem without sacrificing the technique. Instead of starting with oil, you start with two to three tablespoons of water or broth in a hot pan. The liquid creates steam that softens the vegetables and releases their natural sugars. Once the vegetables are partially cooked and starting to brown, you add a small amount of oil — just one teaspoon — for flavor and to help with browning. The result is nearly identical to traditional sautéing with a fraction of the fat.
📋 The Water Sauté Method: Step by Step
Heat the pan over medium-high heat for 2 minutes until it is hot enough that water droplets sizzle and evaporate immediately.
Add 2–3 tablespoons of water or broth instead of oil. It will sizzle and steam immediately.
Add your vegetables — onions, garlic, peppers, mushrooms. Stir frequently. The water will evaporate as the vegetables soften.
When the pan is nearly dry and vegetables are starting to stick and brown, add 1 teaspoon of oil. This is enough to create flavor without excess calories.
Continue cooking until vegetables are browned and fragrant. Deglaze with a splash of broth, wine, or lemon juice if needed.
Poaching: Gentle Cooking for Delicate Proteins
Poaching is the gentlest cooking method. Food is submerged in liquid kept just below a simmer — around 160–180°F — and cooked slowly until done. No oil. No browning. No aggressive heat. Just quiet, patient cooking that produces some of the most tender, moist protein you will ever eat.
The fear with poaching is that the food will be bland. And it will be — if you poach in plain water. The secret is to poach in flavorful liquid. Chicken poached in water with garlic, peppercorns, bay leaf, and a splash of soy sauce absorbs those flavors as it cooks. Fish poached in white wine with lemon slices and fresh dill becomes elegant enough for a dinner party. The cooking liquid becomes a sauce base, so nothing is wasted.
🌊 Temperature Check: Poaching liquid should never boil. Bubbles should barely break the surface — a gentle shiver, not a rolling boil. Use a thermometer if you have one. If not, look for tiny bubbles forming at the bottom of the pot that rise slowly and quietly.
Grilling and Broiling: The Fat-Dripping Methods
Grilling and broiling are essentially the same technique applied from different directions. Grilling uses heat from below; broiling uses heat from above. Both rely on intense, direct heat that sears the exterior of food while the interior cooks through. And both have a built-in health advantage: excess fat drips away from the food as it cooks, rather than pooling around it.
The flavor comes from the char — the caramelization and slight burning that happens when food meets intense heat. That char is where the complexity lives. A grilled chicken breast, properly seasoned and not overcooked, needs no sauce. The grill marks and smoky exterior are the sauce.
🔥 Preheat Properly
A hot grill or broiler prevents sticking and creates instant sear. Preheat for 10–15 minutes. The grates should be too hot to hold your hand over comfortably.
🧂 Season Aggressively
Grilling intensifies flavors but also burns off surface seasonings. Use more salt and spice than you think you need. A dry rub works better than a wet marinade for high heat.
🚫 Don’t Move It
Place food on the grill and leave it alone for 3–4 minutes. Moving it constantly prevents sear marks and causes sticking. It will release naturally when ready.
Building Flavor Without Relying on Fat
The biggest misconception about healthy cooking is that less fat means less flavor. Fat carries flavor, yes, but it is not the only vehicle. Acid, salt, heat, time, and technique all build flavor independently of fat. Learning to use them is what separates boring diet food from food you actually crave.
🧪 The Five Flavor Builders (That Aren’t Fat)
1. Acid — Lemon, Vinegar, Tomatoes, Yogurt
Acid brightens and balances. A squeeze of lemon on steamed vegetables transforms them. A splash of vinegar in a soup adds depth that salt alone cannot provide. Acid cuts through richness and makes flavors pop.
2. Salt — Used Strategically, Not Excessively
Salt does not just make food salty. It suppresses bitterness, enhances sweetness, and amplifies aroma. The goal is not to eliminate salt — it is to use it precisely. Season in layers throughout cooking, not just at the end. Taste as you go.
3. Heat — Charring, Caramelizing, Toasting
High heat creates new flavor compounds through the Maillard reaction and caramelization. A charred pepper tastes completely different from a raw one. Toasted spices bloom with aroma. Roasted garlic is sweet; raw garlic is sharp.
4. Time — Slow Cooking, Marinating, Resting
Time is an ingredient. A marinade left overnight penetrates meat deeply. A slow-simmered sauce develops complexity that a quick sauce cannot match. Resting meat after cooking allows juices to redistribute. Patience creates flavor.
5. Technique — Layering, Deglazing, Reducing
Building a sauce by deglazing a pan with wine, reducing it by half, and finishing with fresh herbs creates more flavor than any amount of butter. Layering aromatics — onion first, then garlic, then herbs — builds depth step by step.
A Sample Healthy Meal Using These Techniques
Here is how these techniques come together in a real meal. Not a recipe — a method. You can apply this framework to almost any protein and vegetable combination.
🍽️ Herb-Crusted Chicken with Roasted Vegetables and Lemon Dressing
Technique: Roasting
Vegetables: Toss broccoli, carrots, and red onion with 1 teaspoon olive oil, salt, pepper, and dried thyme. Spread on a sheet pan and roast at 425°F for 20 minutes until edges are browned and crisp.
Technique: Pan-Searing
Chicken: Season chicken breasts with salt, pepper, and smoked paprika. Sear in a hot non-stick pan with just a light coating of oil spray — 3 minutes per side until golden. Finish in the oven with the vegetables for the last 10 minutes.
Technique: Acid Finish
Dressing: Whisk together 2 tablespoons lemon juice, 1 teaspoon Dijon mustard, 1 minced garlic clove, and a pinch of salt. Drizzle over the roasted vegetables and chicken just before serving. No oil needed — the roasted vegetables are already glossy.
💡 Why This Works: The roasting caramelizes the vegetables without excess oil. The pan-sear gives the chicken color and texture. The lemon-mustard dressing adds brightness and complexity that would normally come from butter or cream. Total added fat: approximately 2 teaspoons of oil for the entire meal. Total flavor: maximum.
The Mindset: Health as Enhancement, Not Restriction
The most important shift in my cooking happened not when I learned a new technique, but when I changed how I thought about healthy food. I stopped seeing it as a restricted version of “real” cooking and started seeing it as a different kind of cooking with its own strengths. Steaming preserves the pure, clean flavor of vegetables. Roasting creates caramelization that no amount of butter can replicate. Poaching produces tenderness that frying destroys.
These techniques are not compromises. They are tools. And like any tool, they work best when you understand what they do and when to use them. A steamed fish with ginger and scallions is not a lesser version of fried fish. It is a completely different dish with its own identity and its own pleasures.
Start with one technique. Master it. Notice how the food changes — not just nutritionally, but in flavor, texture, and appearance. Then add another. Within a month, you will have a repertoire of healthy cooking methods that produce meals you are proud to serve. Not because they are healthy. Because they are good.
Related Articles
About the Author
Youssef El Amrani is the founder of LoveCooking.co, a website dedicated to making everyday cooking approachable, practical, and stress-free for beginners and home cooks. With a passion for simple, real food, Youssef focuses on teaching foundational skills — from ingredient selection and storage to time-saving techniques — that help people cook confidently without relying on expensive gadgets or complicated recipes. His writing is shaped by years of trial and error in his own kitchen, and he believes that understanding your ingredients is the first step toward cooking food you actually enjoy. When he’s not writing or cooking, Youssef enjoys exploring local markets and testing new ways to make weeknight dinners faster and healthier.
Sources
- Harvard T.H. Chan School of Public Health — The Nutrition Source: Healthy Eating Plate
- Academy of Nutrition and Dietetics — Cooking Techniques for Healthy Eating
- USDA MyPlate — Guidelines for Balanced Meals
- Harold McGee — On Food and Cooking: The Science and Lore of the Kitchen
- America’s Test Kitchen — The Science of Good Cooking
- Mayo Clinic — Healthy Cooking Techniques

Youssef El Amrani is a home cook who learned to cook out of necessity — tight budget, small kitchen, no time. Every recipe and technique on LoveCooking.co is tested in his actual home kitchen with standard equipment. No culinary degree, just years of daily practice. Contact: contact@lovecooking.co